Testing With Vegeta Through A Web UI
Overview
If you toyed enough with Go in the last few years, chances are you had to build at least one microservice, or an http-based API endpoint to serve a certain functional requirement. Among the performance testing tools available, Vegeta is a remarkably straightforward and useful one: it helps you bombard your service with a constant, user-defined number of requests per second.
This does not necessarily give you a real-life usage perspective, but it fulfills a very important function, by revealing the approximate ceiling of reasonable usage for your service, relative to the existing hardware and network conditions. I personally found Vegeta an invaluable tool, particularly in the early stages, before the service becomes part of a larger, committed code base. In most cases, the conditions on your development environment or box won't match production, but an extrapolation game, based on your experience and intuition, is in order.
Another extremely useful outcome of testing with Vegeta is a much higher probability to trigger the "fatal error: concurrent map iteration and map write" panic. In effect, it is helping you find subtle code bugs, where concurrent access to maps and their values is not properly protected against race conditions.
Vegeta is mostly used via a command line interface, but its functionality is fully contained in the lib subpackage. About two years ago, I tapped into that functionality to build an incipient, interactive UI, to help the QA team colleagues at the time do preliminary stress-testing for a project with very specific SLAs regarding response times. Without going into too much detail, this article highlights the approach taken to build the tool, along with some implementation facets.
The code is mostly the one from 2015, updated here and there, when Vegeta function signatures changed. Fortunately, they haven't changed much since.
Libraries Used
On the back-end side, I ended up using Gorilla, an established and highly regarded toolkit, made by Go veterans, for handling requests as well as for the websocket communication part.
For front-end, I opted for Semantic UI, simply because I had never used it before. It's not cutting edge reactive stuff, and it uses JQuery for the behind-the-scenes scripting. I have absolutely no problem using JQuery for simplicity and quick implementation, and the prefabricated validation structures helped towards a relatively fast code output.
Interface
Since I didn't have much time to work on this project, I aimed to have a very simple, four-step interface. The first contains the target url, and the request type:
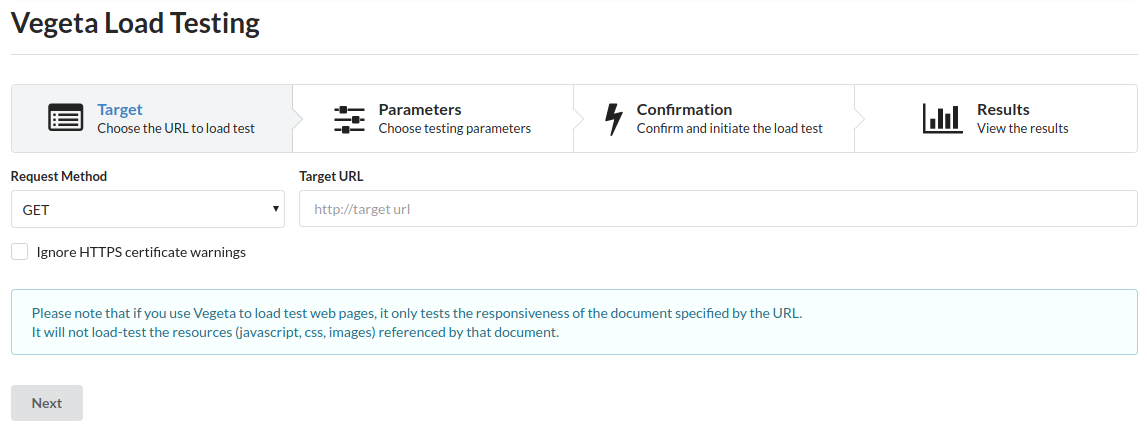
The parameters roughly correspond to the vegeta.Targeter which is a function taking a structure with the basic http request parameters.
targeter := vegeta.NewStaticTargeter(vegeta.Target{
	Method: attackMethod,
	URL:    targetURL,
    Body:   body,
})
The second step contains parameters that help adjust the frequency, duration and timeout tolerance for the load test:
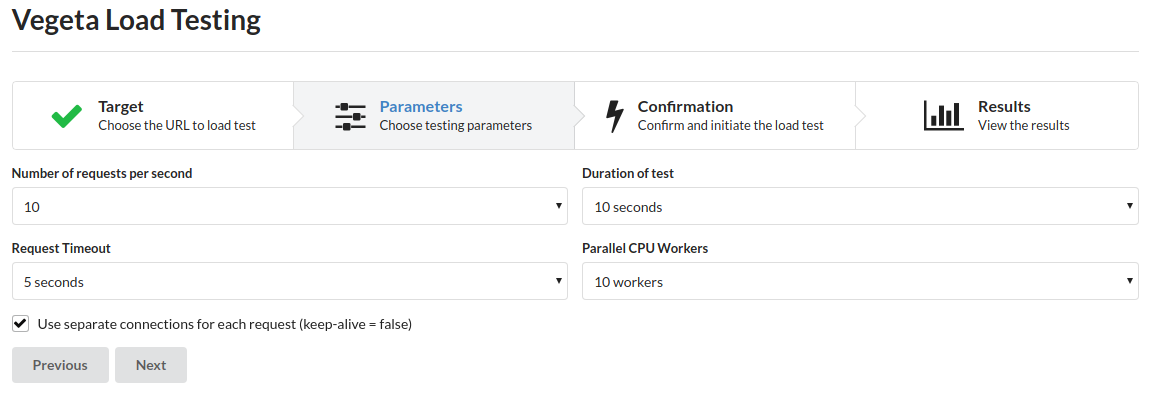
These parameters (along with the option of ignoring invalid certificates from the previous step) are being passed to a vegeta.Attacker structure:
// set up the tls config to ignore invalid certificates if applicable
c := &tls.Config{InsecureSkipVerify: ignoreInvalidCert}
attacker := vegeta.NewAttacker(
	vegeta.Timeout(time.Duration(timeout)*time.Second),
	vegeta.Workers(uint64(workers)),
	vegeta.KeepAlive(!differentConnections),
	vegeta.TLSConfig(c))
The next step is one final opportunity to review the attack parameters before launching it. The attack is then initiated and visually tracked with a progress bar. At the end, the final step is presented, which contains the results histogram and a link to Vegeta's own generate plot results chart.